Zebra Label Printer Setup & Labels for register by ability business Printing Guide #
This guide will walk you through:
- Installing the Zebra Printer Driver (Skip this part if already installed)
- Installing Labels For register by ability business
- Printing a Label in Labels For register by ability business
Part 1: Installing Zebra Label Printer Driver (Skip this part if already installed) #
Step 1: Download the Driver
- Visit the Zebra support page https://www.zebra.com/us/en/support-downloads/printers.html
- Search for your specific printer model (e.g., ZD420, GK420d)
- Download the ZebraDesigner Driver for Windows
Step 2: Install the Driver
- Extract the ZIP file if needed, then run the installer (e.g., zd510-installer.exe).
- When prompted, select Install Printer Drivers.
- Choose Install a new printer.
- Select the correct connection type:
- USB: Plug in the printer when prompted.
- Network: Select the printer on your network
- USB: Plug in the printer when prompted.
5. Follow the on-screen steps to finish driver installation.
Step 3: Test the Installation
- Go to Control Panel > Devices and Printers.
- Right-click on the Zebra printer > Printer Properties > Print Test Page.
Part 2: Installing Labels For register by ability business #
Step 1: Download the Software
- Go to: static.abilitybusiness.com/download/placeholder.exe
Choose to KEEP the file download if the browser prevents it.
Step 2: Install Labels For register by ability business
- Run the downloaded installer.
- Follow the prompts to install.
- Once installed, launch Labels For register by ability business from your desktop or Start Menu.
Part 3: Printing Tags #
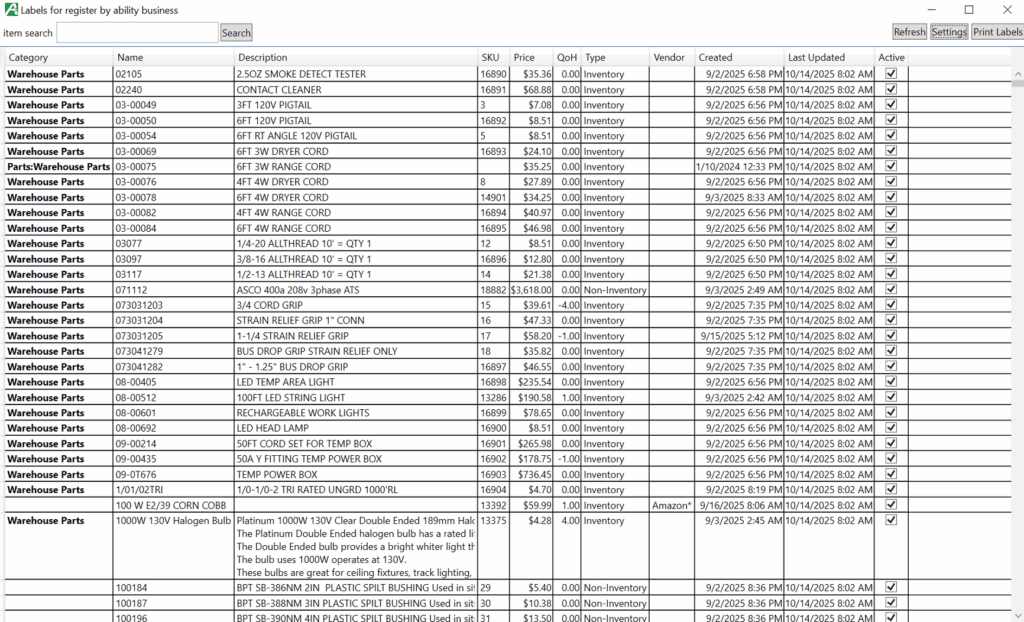
1: Use the item search bar to find your item by item name, description or SKU.
2: Clicking on the column name will sort items by that column.
3: To select items in the list, you can press and hold the Shift key and then click the first and last items to select a contiguous range, or click the first item and drag the mouse to the last item to also select everything in between.
4: To select non-contiguous items, press and hold the Ctrl key and click on each individual item to select them, adding them to your selection one by one.
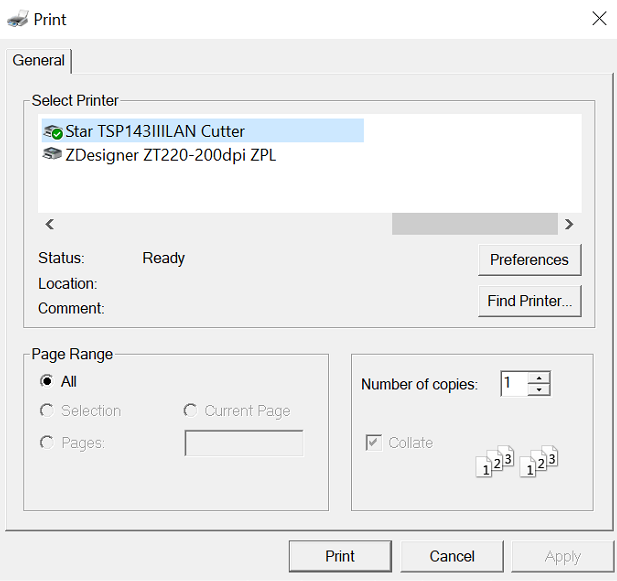
5: After your items to print to labels have been selected press the Print Labels button in the top right hand corner. Select the label printer you wish to use(your label printer may already be selected) and specify how many labels you would like to print for the currently selected items. Press the Print button to complete the job.
Part 4: Settings #
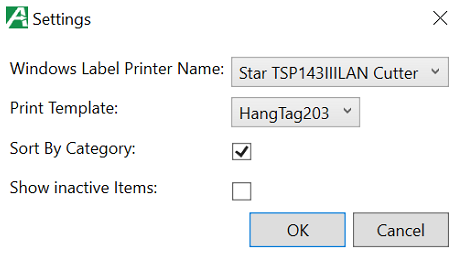
The settings menu button is in the top right corner next to the print labels button.
There are currently four options available.
- Windows Label Printer Name
- Print Template
- Sort By Category
- Show Inactive Items
Best Practices #
- Keep backup rolls or sheets of label stock.
- Use barcodes whenever possible for faster scanning and fewer errors.
- Regularly verify that prices on labels match the current prices in the system.

